

I guess you could say that I am going for a "junk yard" decor for my small dorm room.

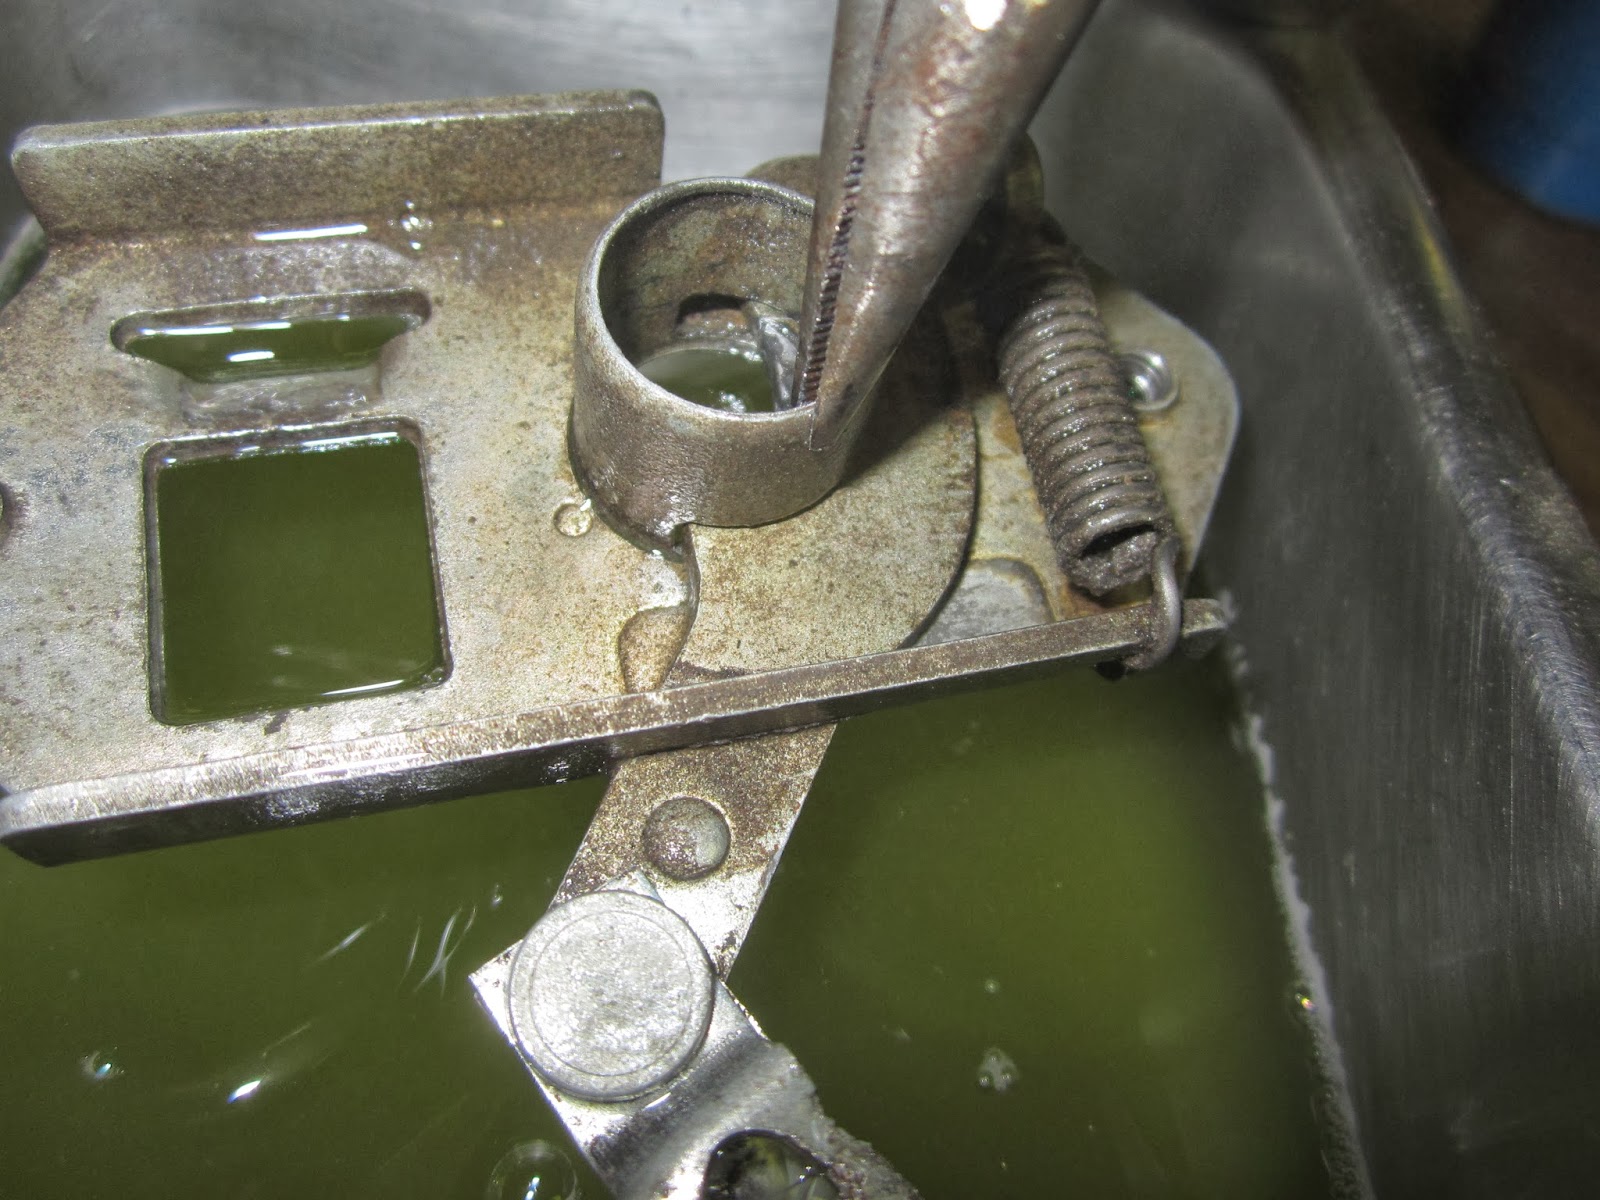 The first thing you'll see me do with many of the smaller metal parts that are full of gunk, is I'll put some simple green in a stainless steel cup and set that on some heat, in my case, I have an electric stove in the garage I use for powder coating. So I took apart both of the mechanisms and put all the metal parts in some boiling simple green, this really helps break down the grease and oil. After about 20 minutes most of the grease had fallen off, I got the remaining crud off with a brush.


 Then I moved on to the lenses, one of them was fine, the other had a chip in the side and a seized screw in the hole, which after trying to remove the screw cracked the plastic some more. Thankfully these to imperfections are relatively easy to fix. Oddly enough the best glue to use for something like this is Super Glue, because what the super glue will do is melt a thin lay of plastic and with the pieces are pressed together they become one piece again and if done correctly, it can look like nothing even happened. Once the glue was dry, I cleaned the lenses with some Simple green, then buffed out the lenses using one of my favorite products Wizards Shine Master. I will be doing a right up on this stuff because it is truly amazing, and brings out a magnificent shine.


 Since I was working this past week while my cousins were here I wanted
to give them something to do while I was at work and despite my instincts, I let
them work on some parts from the car. I forgot to mention that they are 15 and
12 years old, but I knew they wanted to see this car done as bad as I did so I gave
them the task of cleaning up all of the parts on the door panel. Besides not
taking a before picture they did great, washed all the parts, polished all the
chrome, and used black restore on all the black parts.
Since I was working this past week while my cousins were here I wanted
to give them something to do while I was at work and despite my instincts, I let
them work on some parts from the car. I forgot to mention that they are 15 and
12 years old, but I knew they wanted to see this car done as bad as I did so I gave
them the task of cleaning up all of the parts on the door panel. Besides not
taking a before picture they did great, washed all the parts, polished all the
chrome, and used black restore on all the black parts.

 The front blinkers were fairly easy to clean up with exception of these two mounting brackets that had rusted and could not be used. I replicated them as best as I could by welding a bolt to piece of sheet metal and they turned out pretty good, I painted them white so you wouldn't be able to noticed them through the amber lenses. I washed the housings and I think some of the black undercoating got splattered on the housings because I scrubbed and scrubbed but was not able to get it all off. Maybe I shouldn't have cared but i'm just stubborn. The old and cracking heat shrink was cut off and I wrapped the wires in electrical tape, winding the tape in one direction and again in the opposite direction to make sure no water gets in. I sprayed the rubber seal in WD-40 and let it sit for some time to rejuvenate it and lastly polished the lenses.
 I
discovered that the middle section of the bumper was cut out for some reason! I decided I would take it apart and salvage what I
could. After seeing how rusty the inside of the bumper was I soaked it in
penetrating oil and started to try and loosen the nuts holding the rubber strip
on...*SNAP* the bolt sheared right off! No effort at all. I figured that
one wasn't so bad, and tried a second nut, nice and easy now...*SNAP* there
goes a second bolt. Now I just want to get the darn thing off and what do you
know they ALL sheared off. Next I worked on separating the corner section from
the cut middle piece. I won’t go into detail but it ends with me throwing a
wrench and trashing the bumper sections!
I
discovered that the middle section of the bumper was cut out for some reason! I decided I would take it apart and salvage what I
could. After seeing how rusty the inside of the bumper was I soaked it in
penetrating oil and started to try and loosen the nuts holding the rubber strip
on...*SNAP* the bolt sheared right off! No effort at all. I figured that
one wasn't so bad, and tried a second nut, nice and easy now...*SNAP* there
goes a second bolt. Now I just want to get the darn thing off and what do you
know they ALL sheared off. Next I worked on separating the corner section from
the cut middle piece. I won’t go into detail but it ends with me throwing a
wrench and trashing the bumper sections! 
 The dome light really didn't have anything wrong with it, was only a little dusty, But that was enough for me to take it all apart (partly because I wanted to see how everything works). I just washed everything with soap and water, then dried thoroughly.